Buttercream Effects with the Leaf Tip

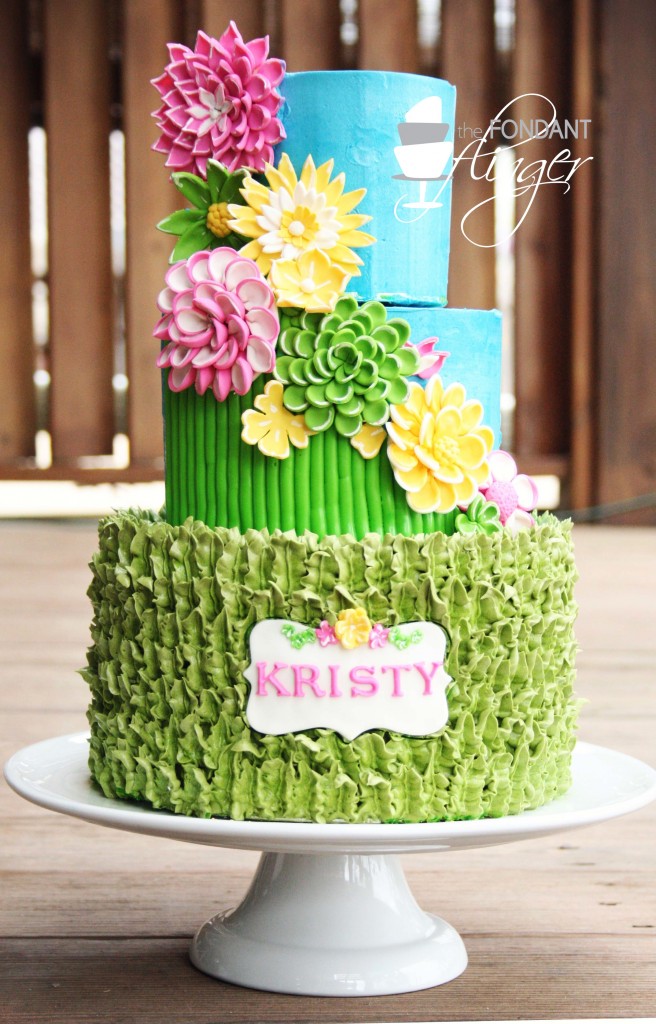
Ah, the leaf tip. Its just such a versatile piping tip and one I’ve been using quite a bit these past months. Most recently, I used it on this cake as part of a large dessert table for a church event.

LeafTutorial4

I’ve used this technique on a few of my cakes so far and it is perfect for when the budget may be smaller or time does not allow for a full fondant ruffle technique done on an entire tier.

LeafTutorial3

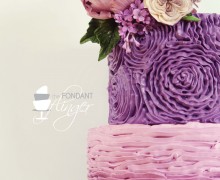
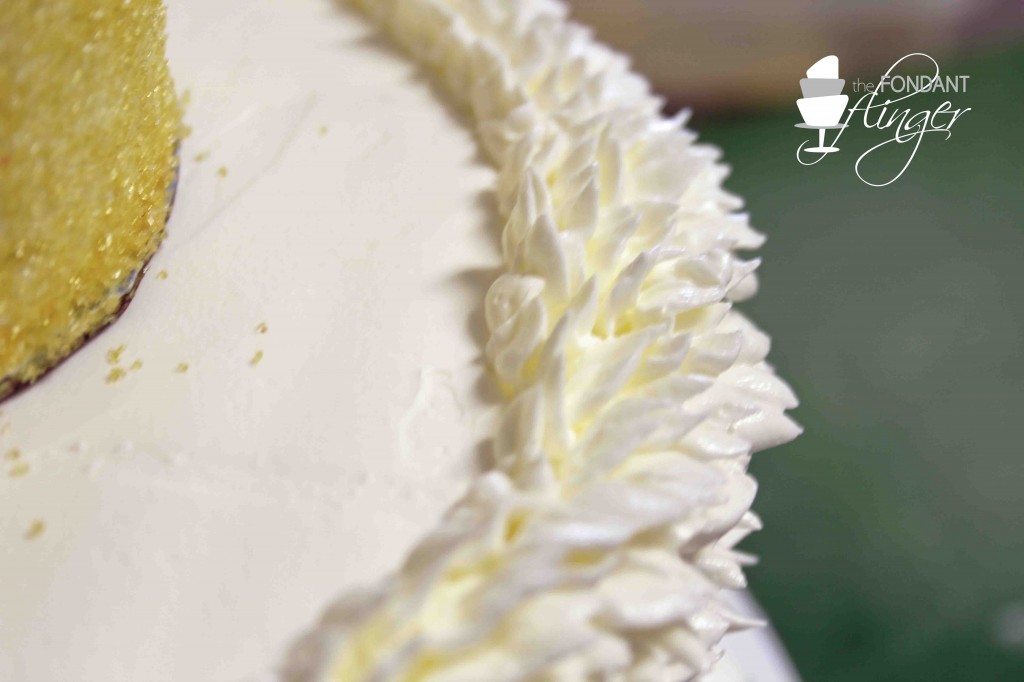
Its very similar to the technique used on my “Welcoming Spring” cake (below), however the angle of the tip is altered so that the tip is pulled up vertically, there was a bit more ruffling done during the piping and the rows are done a bit different to create the overall look of grass sprouting upward.

KristyFullFront View

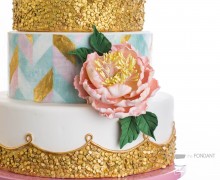
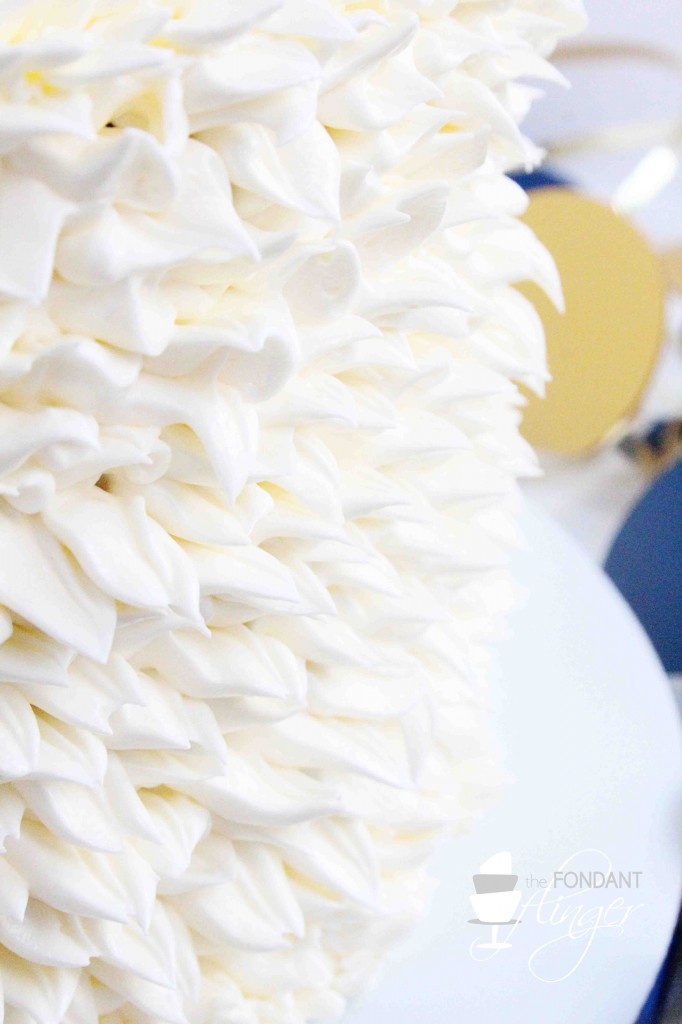
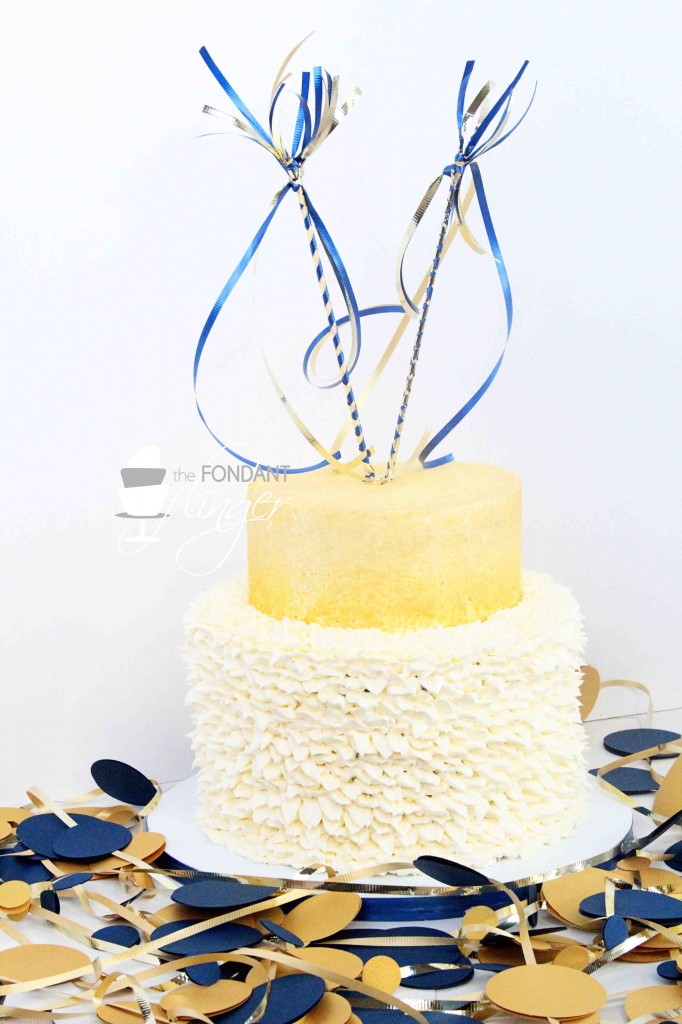
For the Great Gatsby cakes that were created earlier this year, the “feathery” look of the buttercream was achieved with the same leaf tip. I wanted to play off of the gum paste feathers that were painted gold and used as accents so with a quick change of the angle, the piped feathers were formed. Instead of pulling the piping bag up and slightly ruffling each one, I pulled the tip straight out from the cake and completed the rows in that way so that the tips of the “feathers” were predominately what you saw when viewing the cake.

IMG_6619

Clearly, the color of the buttercream plays a tremendous role in varying the look of the cake as well.

LeafTutorial6

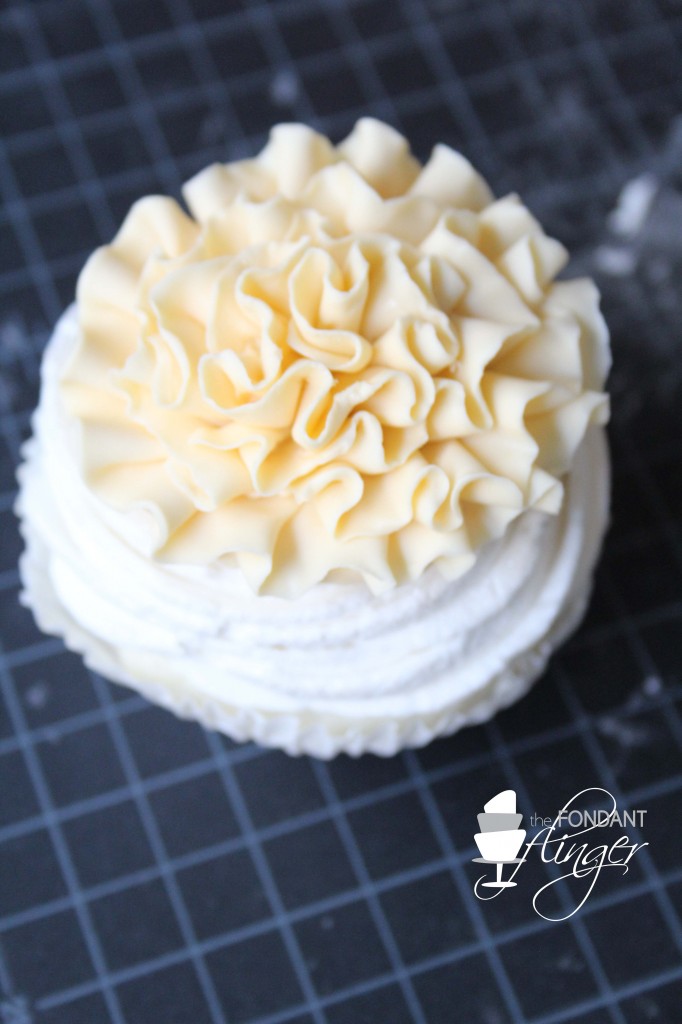
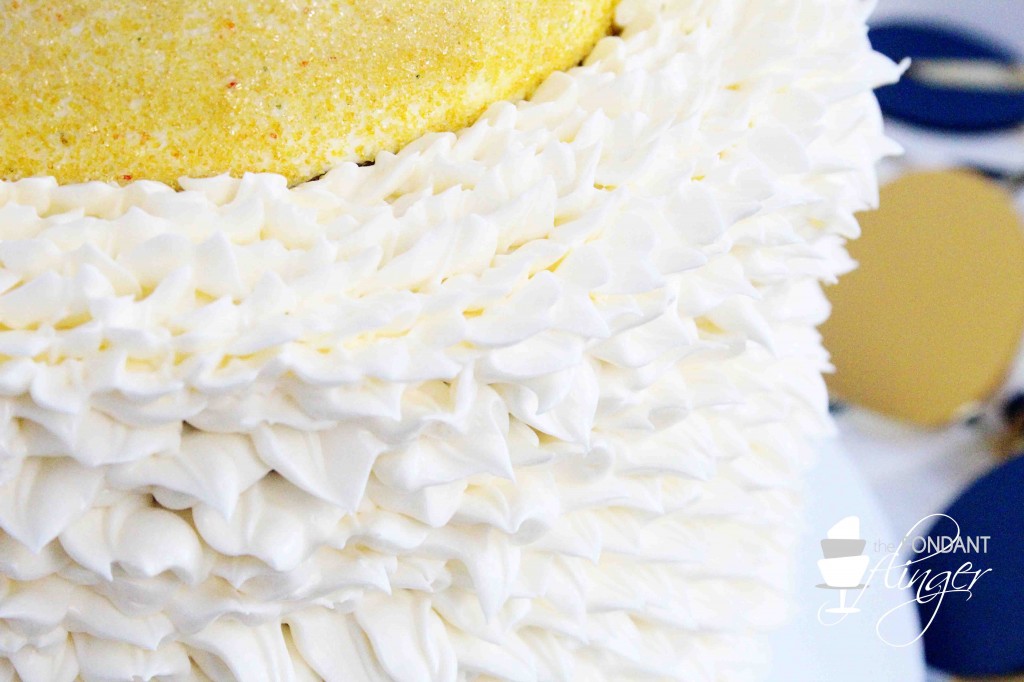
Basically the only thing I changed for this past weekend’s cake for a dessert table is the top portion. Instead of pulling the leaf tip straight out from the sides of the next tier, I pulled them up vertically to give the cake a bit more “poofiness” (that’s a word, right?).

LeafTutorial10

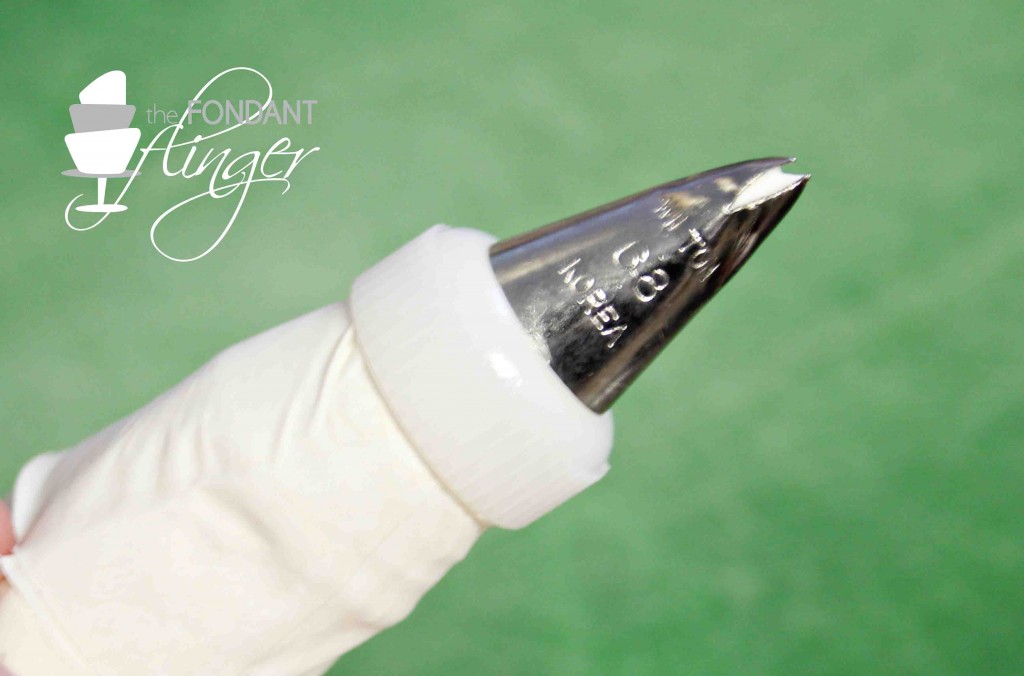
I used a Wilton leaf tip.

LeafTutorial2
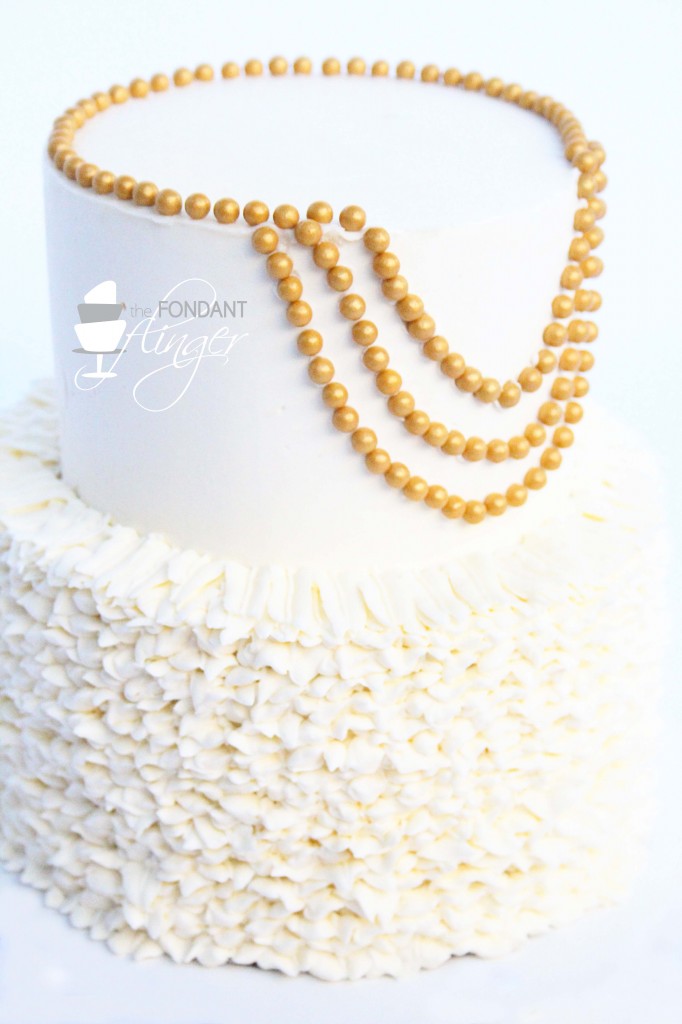
And when I got to the top of the cake after piping the feathers, I began making each leaf more vertical (sorry for the not so great photo. My hand had quite a bit of shakiness after all that piping!).

LeafRuffleTutorial1When it was done, it gave the cake a full and textured appearance .

LeafTutorial5If you have any questions, please comment below and I’ll do my best to walk you through.


Happy caking all!


Ruffle Cupcake Topper Tutorial

Its Tuesday! Nothing very incredibly special about this day whatsoever except that I’ve decided to do a free tutorial! How exciting is that?! We’ll call it “Terrific Tutorial Tuesday” to add a bit of flair to it.

Just a rather simple tutorial with very few tools. Here is what you’ll need:

  • Round Cutters
  • X-acto blade
  • Square of foam
  • Cutting mat
  • Small Rolling Pin
  • Ball tool
  • Fondant
  • Powdered sugar to keep things from getting sticky on ya
  • Plastic wrap to keep fondant nice and pliable
  • Small paintbrush (I use a fine point paintbrush for these)
  • Small amount of water or sugar glue


IMG_6970

Using your small rolling pin, roll out your fondant on self-healing cutting mat dusted with powdered sugar. I like my fondant rather thing so I roll mine to approximately 1/8″ thick. Using a round cutter about 2″ in diameter, cut out as many disks as cupcake toppers you are making.
IMG_6976

Remove excess fondant and wrap tightly with plastic wrap to keep it from drying out. Carefully set aside the round disks to dry. You need to gently move them so your pretty little round disks don’t become misshapen ovals, unless you happen to love the look of misshapen cupcake toppers. If you do, feel free to haphazardly toss them aside to dry.

IMG_6977

Take your excess fondant and again roll it out on your dusted cutting mat. I go fairly thin on the ruffles so shoot for 1/16″ and you should be good to go. Once rolled out, take your X-acto blade (a nice, new, clean blade, mind you!) and cut a long strip about a 1/2″ wide.

IMG_6978

Again, wrap up the excess so that it doesn’t dry out on you while you work with your ruffle strip. Place the strip onto a foam square and using your ball tool, ruffle only the top edge.

IMG_6980

I use a gentle “eraser” motion to make the ruffle, then I come back and every so often, place my ball tool half way off the ruffle and pull downward to pull the ruffle back towards the non-thinned edge.

IMG_6982

Using a teensy, food-safe, fine point paintbrush apply a small amount of water or sugar glue to the fondant disk.

IMG_6984

Take your long ruffle strip and on one end, fold the ruffle back and under to create a “loop”. Gently pinch the non-thinned portion to secure this loop. Place the loop on the first round disk so that the “seam” is under the ruffle.

IMG_6986

To make the ruffles, continue to make “s” shapes with the fondant strip, and securing each loop by gently pressing down at the base of the ruffle. This also forces the little ruffle loop upward making it extra cute.

IMG_6987

Continue around the edge of the round disk to create the first level of ruffles.

IMG_6990

When you reach your starting point, overlap the second ruffle leaving about a 1/4″ of the first layer exposed.

IMG_6992

When your first ruffle strip finally runs out, simply roll out some more fondant, cut a 1/2″ strip, ruffle the edge, create your first loop on the end and continue this whole fun process.

IMG_6995

I continue to do this until I get about 3 ruffle layers in.

IMG_6996


Then, I make another long strip of ruffled edged fondant and create a long strip of the ruffle on my mat.IMG_7001


I then roll the ruffle up into a nice “center”.

IMG_7003


Pinch the excess fondant on the bottom edge into a “log” and cut off the excess with my blade.


IMG_7004

Use your paintbrush to add in some water on your prepped disk and gently set the center in the middle of your ruffles.

IMG_7005

To get a more secure attachment, carefully insert the non-brush side of your tiny paintbrush between the ruffles in the center and push downwards.

IMG_7006

And there you go! A ruffled cupcake topper just perfect to turn any everyday cupcake into something fancy schmancy.

IMG_7008